Looking to elevate your soap-making skills? DIY soap pouring techniques are a fun and creative way to add flair to your handmade soaps. From swirls and layers to intricate designs, there are endless possibilities to explore. In this article, we’ll dive into some top tips and tricks for mastering the art of soap pouring, so you can create stunning and unique bars that will impress friends and family. Let’s get started on your soap-making journey!
What are the 4 methods of making soap?
If you’re interested in making your own soap, there are four main methods to consider. The cold process method involves mixing lye with oils, while the melt and pour method uses a premade soap base that you can customize with your own additives. Hot process soap making involves cooking the ingredients, and the rebatch method uses already-made soap that is grated and then melted down to add new ingredients. Each method offers its own unique advantages and challenges, so it’s worth exploring to find the best fit for your preferences and skills.
What swirl techniques can be used for soap making?
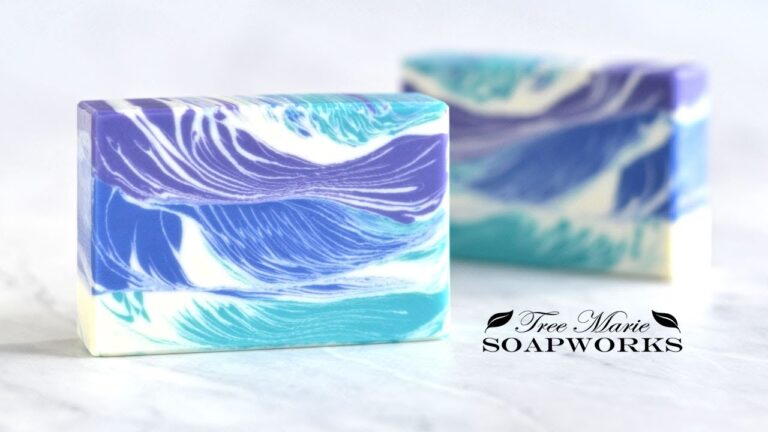
There are various swirling techniques for soap making, each yielding unique and beautiful designs. From the classic Drop swirls and In-the-pot (ITP) swirls to the more intricate Taiwan swirl, Hanger swirl, and Secret swirl, there are plenty of options to choose from when creating stunning soap designs in a regular loaf mold. For those using a slab mold, techniques like Column pour, Pipe divider swirl, and Peacock swirl offer even more possibilities for creating eye-catching patterns and textures in soap. Whether you’re a beginner or a seasoned soap maker, experimenting with different swirl techniques can add an extra element of creativity to your handmade soap creations.
In the world of soap making, the possibilities for creating captivating swirl patterns are endless. With techniques like Drop swirls, In-the-pot (ITP) swirls, Taiwan swirl, Hanger swirl, and Secret swirl, soap makers can achieve stunning designs in a regular loaf mold. For those using a slab mold, swirling techniques like Column pour, Pipe divider swirl, and Peacock swirl offer even more options for creating visually striking patterns and textures in soap. Whether you’re a hobbyist or a professional soap maker, exploring and mastering different swirl techniques can elevate your soap making game and result in truly unique and eye-catching creations.
Does melt and pour soap need to cure?
Melt and pour soap is a convenient and easy way to make your own soap at home. With this method, you don’t have to worry about handling lye or waiting for the soap to cure. The soap base is already pre-made and ready to use once it has cooled and hardened.
This makes melt and pour soap a great option for those who are new to soapmaking or want a quick and simple DIY project. It’s a family-friendly activity that allows you to get creative with colors, scents, and additives without the need for complex processes like curing. With melt and pour soap, you can enjoy the benefits of handmade soap without the wait.
Overall, melt and pour soap is a hassle-free way to create your own unique soap bars without the need for curing. This method is perfect for beginners and families looking to enjoy the fun of soapmaking without the time and effort required for traditional soapmaking techniques. So, go ahead and dive into the world of melt and pour soap for a simple and enjoyable DIY experience.
Crafting Beautiful Bars: Mastering DIY Soap Pouring
Learn the art of DIY soap pouring and elevate your craft with our step-by-step guide to Crafting Beautiful Bars. From choosing the perfect ingredients to mastering different pouring techniques, we’ll help you create stunning soap creations that are both functional and aesthetically pleasing. Whether you’re a seasoned soap maker or a beginner looking to get started, our tips and tricks will inspire you to unleash your creativity and make your own unique soaps that are sure to impress.
With a focus on precision and creativity, our guide to Mastering DIY Soap Pouring will help you achieve professional-looking results right in the comfort of your own home. Experiment with colors, scents, and designs to craft beautiful bars that reflect your personal style. With our expert advice and techniques, you’ll be able to create soap masterpieces that make perfect gifts or add a touch of luxury to your daily routine. Start your soap pouring journey today and discover the joy of creating your own handmade soaps.
Expert Tips for Perfecting Your Soap Pouring Skills
Are you looking to take your soap pouring skills to the next level? Look no further! With these expert tips, you’ll be able to create beautifully poured soaps every time. First, make sure to invest in high-quality molds and tools to ensure a smooth and precise pour. Additionally, practice proper technique by pouring the soap slowly and steadily to avoid air bubbles and uneven surfaces. By following these tips, you’ll be well on your way to perfecting your soap pouring skills and creating stunning handmade soaps.
Furthermore, experiment with different colors, scents, and designs to add a personal touch to your creations. Don’t be afraid to get creative and try out new techniques, such as swirls or layering, to make your soaps stand out. Remember, practice makes perfect, so keep honing your skills and refining your pouring technique. With dedication and these expert tips in mind, you’ll soon be a master at creating beautifully poured soaps that are sure to impress.
Incorporating DIY soap pouring techniques adds a personalized touch to your creations, allowing you to unleash your creativity and experiment with different colors, scents, and designs. Whether you’re a seasoned soap maker or just starting out, these techniques offer endless possibilities for crafting unique and beautiful soaps. So grab your supplies, get ready to pour, and watch as your creations come to life in vibrant, one-of-a-kind designs that are sure to impress. Dive into the world of DIY soap pouring and let your imagination run wild!


